Click the image for a bigger photo.
Dell Latitude E7470
CPU		Intel Core i5 6300u @ 2.93 MHz,	2 cores, 4 threads, Passmark : 3300
RAM		8 GB
Drives		'Micron 1100' M.2 SSD : 256 GB
Ports		USB (3x), VGA, Ethernet, Audio, SD card, HDMI
Case		Laptop
OS		Windows 10
I played along with the Windows for a few hours but got sick and tired of this childish nonsense and changed the BIOS such that titaan would boot off USB. Slackware 15.0 Live booted to a very nice machine. titaan is a real asset. With Linux on it, not with the Redmond Virus.
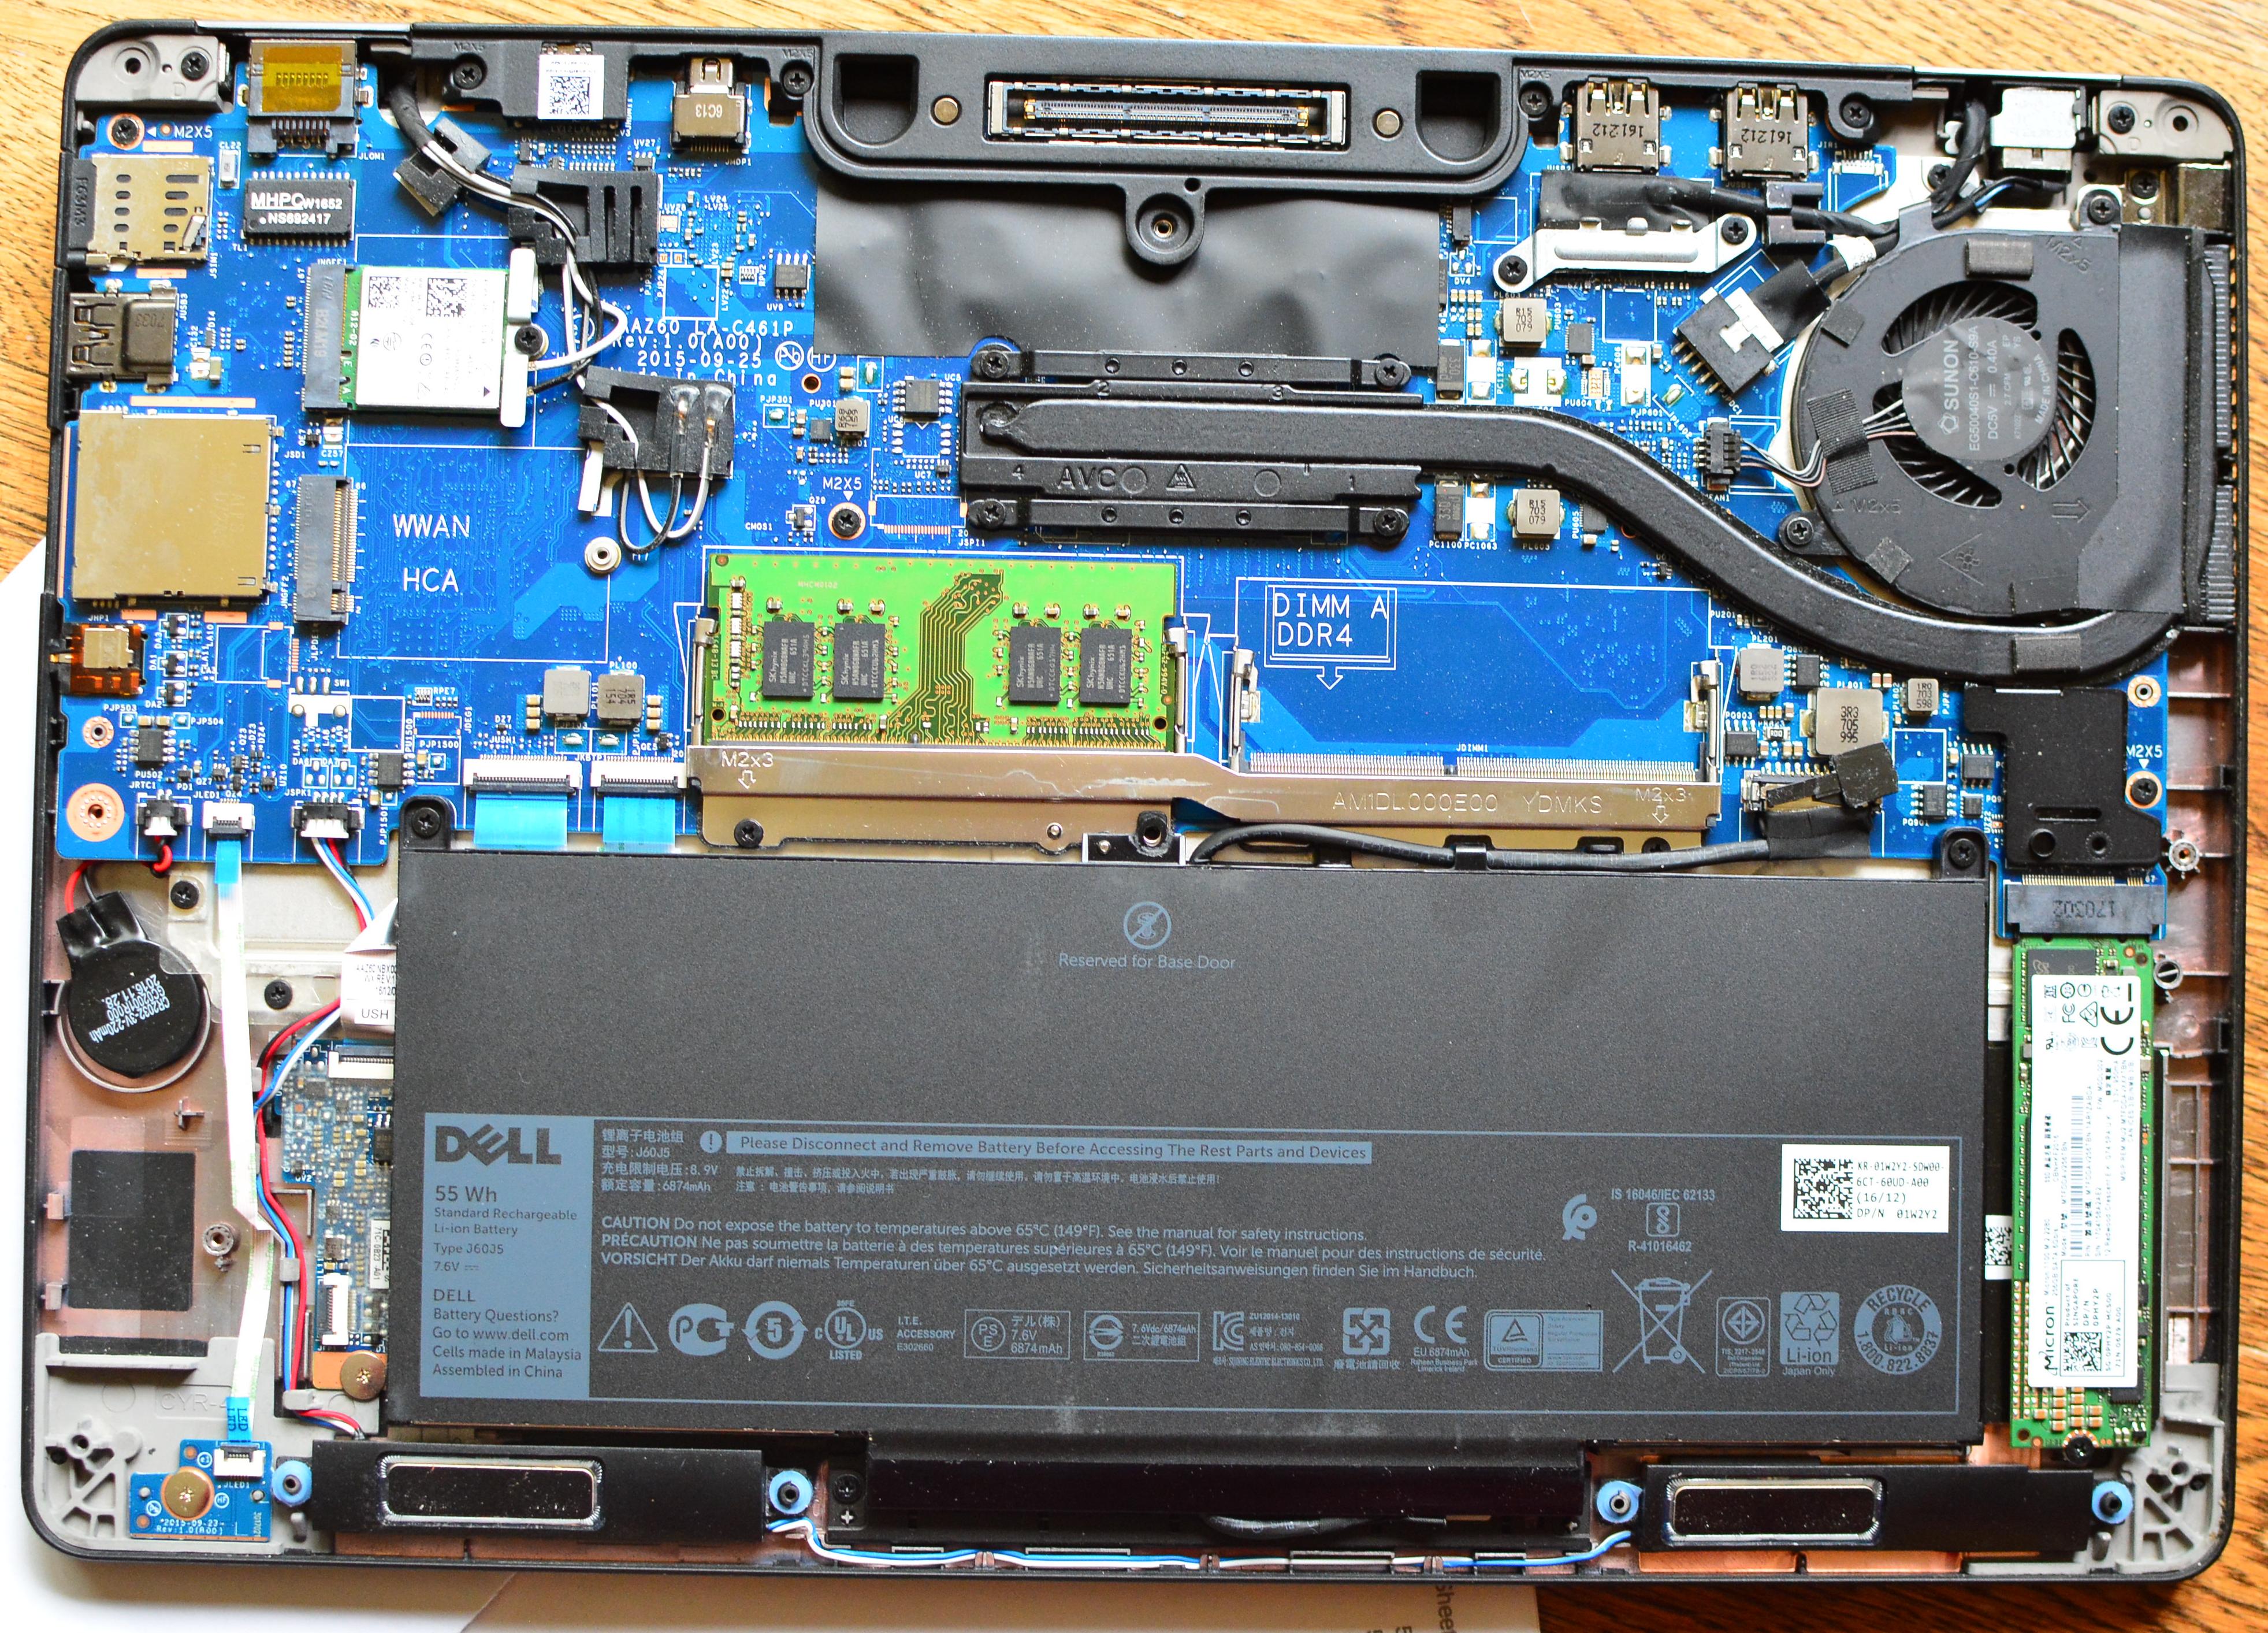
Opening the bottom cover
That was a piece of cake. One of the easiest to open laptop ever (something familiar to all my Latitudes).
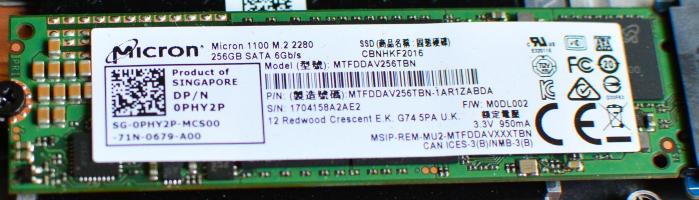
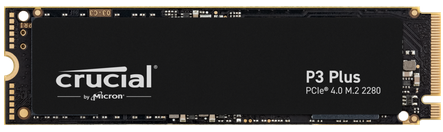
I removed the Micron SSD (which was a 'slow' SATA disk inside an M.2 slot) and replaced it with a "Crucial P3 plus" 500 GB PCIe SSD. That ought to bring the machine up to speed.
Changes to titaan
Getting an operating system on Titaan
Slackware 32
UEFI is a pain in the bottom. You set a boot sequence. It is valid for three bootings and then suddenly the BIOS has changed that sequence by itself. Sometimes the machine boots, sometimes not. I got a bit confused at some points. What happened before was, in the end, also rather chaotic. I leave it in this page; some people might recognize parts and benefit from my experiences. At this point I will focus on how I succeeded.
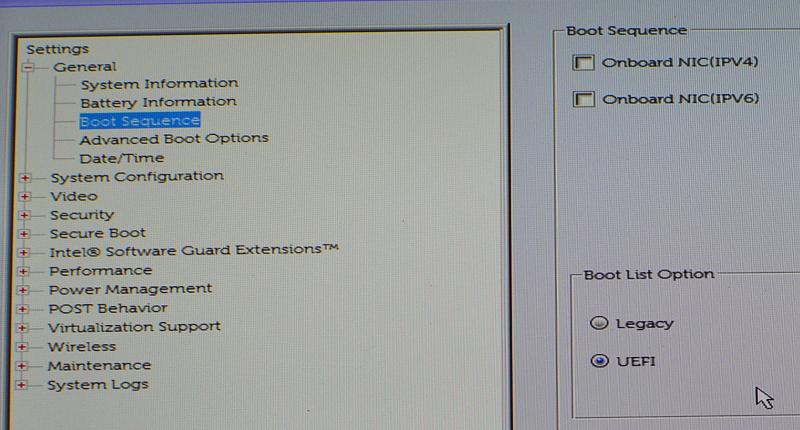
BIOS settings
It is impossible to make screenshots of the BIOS screens. So I put the Nikon on a tripod and made pictures of the BIOS screens. These shots are below. Most are made to appear smaller with a 'width=800' statement, so please feel free to load each shot in a new tab.

DOS partitioning the Crucial P3+ disk
First: let's see how this disk is called:
lsblkIt is called '/dev/nvme0n1'. Quite a long name... We'll just use it in the usual way. It cannot get any easier. Just enter the command
cfdisk /dev/nvme0n1choose to make a DOS scheme and create three partitions:
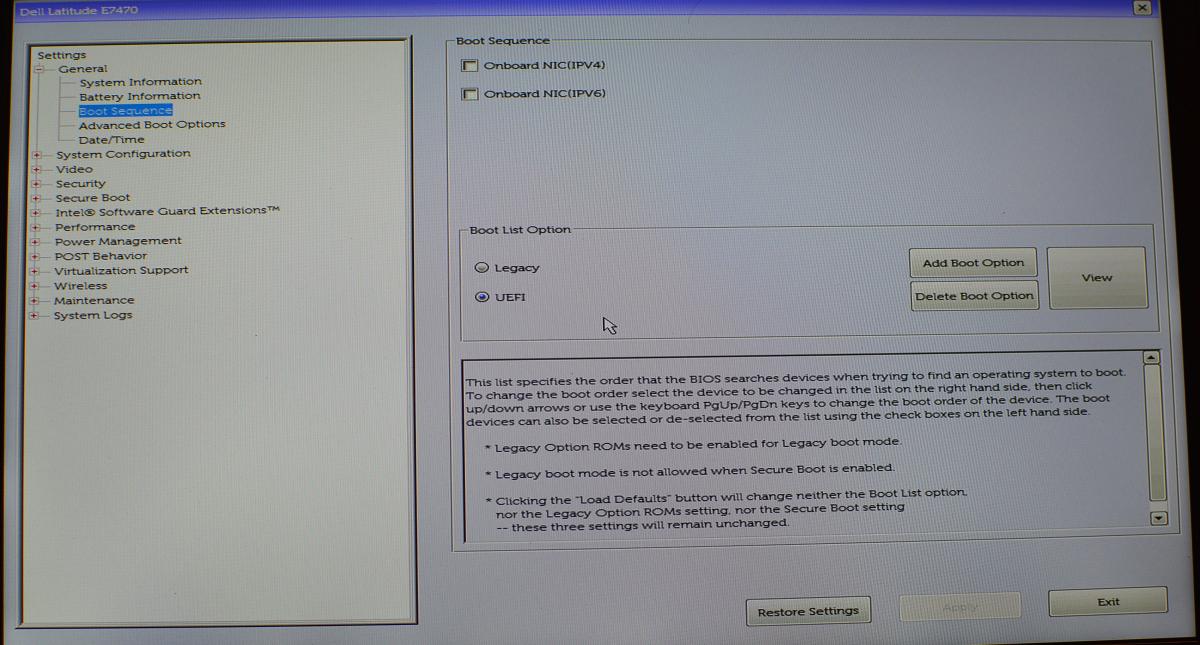
BIOS settings as text
There are a myriad of options that can be set, but most of them do not relate to the booting of operating systems. The only options that do are mentioned below:
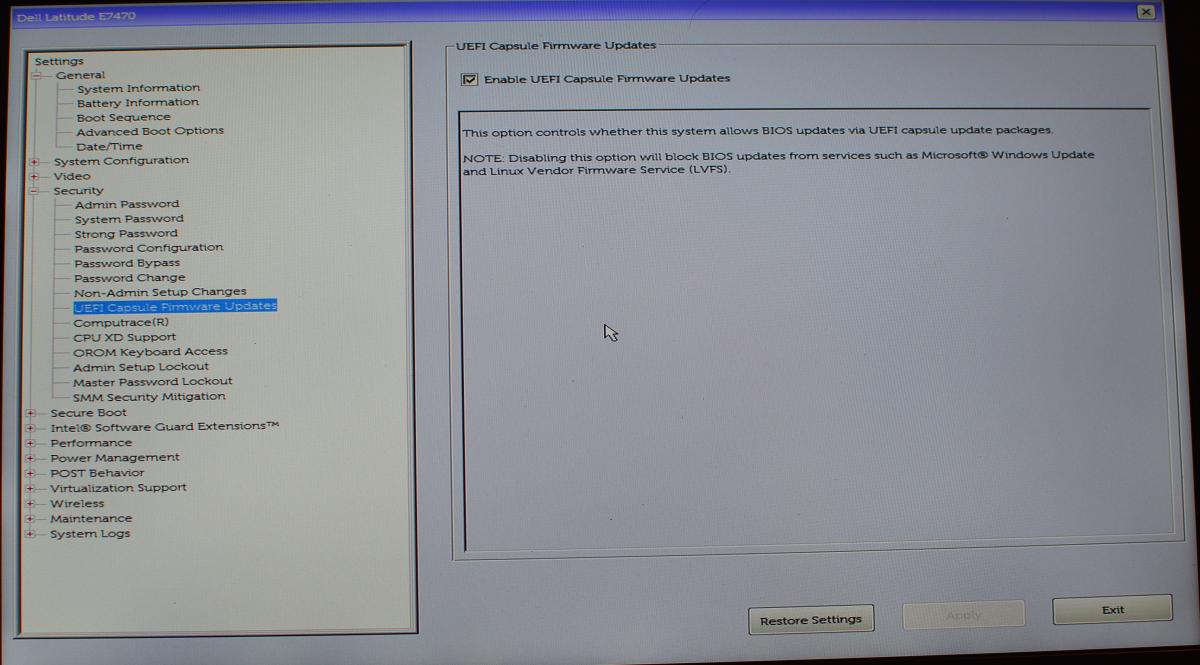
Bootsequence			: Boot list option = choose UEFI, not Legacy
Advanced Boot options		: Enable Legacy Option ROMs = enabled
				  Enable Attempt Legacy Boot = enabled
Secure Boot			: Disabled
UEFI Capsule Firmware Updates	: Enabled
From the moment I had these settings, I could boot any USB disk image. BUT you need to press the F12 key when the DELL splash logo appears after/during the cold start. Then wait until the 'one time boot menu' appears and the USB ISO image will be listed. Boot it.
Slackware 64 on MBR disk
The system was stable, but it required close to 60 seconds to boot up. 'Koper', the Asus i3 1115G4 machine, booted off its NVME drive in something like 12 seconds. Titaan needed close to 15 seconds to produce the splash screen. And then some more to recognize an UEFI boot was not possible and then the machine would perform a legacy boot.
So I set out to change things: I would install Slackware 64 on the Crucial P3 using the UEFI firmware. If you are looking for 'a walk in the park install': don't do it. It took me around 8 hours continuously. I had to
Wiping out the NVME disk
You can use the command
# wipefs --all /dev/nvme0n1which erases thr MBR signature '55AA' from the first sector. But I also followed Alien Bob's advice to be sure:
gdisk /dev/nvme0n1
'x' to enable the entended options.
'z' to zap (wipe out) the existing GPT.
'Y' to all questions.
Next, during the install, use cgdisk to partition the disk.
GPT partitioning the Crucial P3+ disk
Easy. Just issue the command
cgdisk /dev/nvme0m1and cgdisk recognizes the broken formatting and makes suggestions. Go for a GPT format, and the rest is similar as in cfdisk. You only need not make primary or logical partitions. Essentially, all partitions are primary. I set out to make
BIOS settings as text
After a 'reset to factory defaults' everything is in a defined state. Below I listed all the things that I have changed and that could have significance in booting.
General
  Boot Sequence
    Boot list options : UEFI (ignore the rest)
  Advanced boot options
    Enable Legacy option ROMs

System Configuration
  SATA Operation      : AHCI
  SMART reporting     : Enable SMART reporting
  USB Configuration   : Enable USB boot support

Security
  UEFI capsule firmware updates : Enable UEFI capsule firmware updates

Secure boot
  Secure boot enable  : Disabled

Performance
  Multi core support  : Enable Multi core support
  Intel Speedstep     : Enable Intel Speedstep
  C-states control    : tick 'C-states'
  Intel Turboboost    : enable Intel Turboboost
  HyperThread control : Enabled

POST behavior
  FastBoot            : Auto
With this setup, my Dell Latitude E7470 system boots off a USB installer.
Installing Slackware 64
I got a recent disk image ISO from Alien Bob's server and dd-ed it to an 8 GB USB stick. Put it into a USB port on the target machine and power it up. When the splash screen appears, hit the F12 key. On screen will be a lot of boot options. Ignore them all, apart from the line that lists the specifics of your USB drive. Boot that image.
If everything is good, you end up in a grub-screen. In the topleft are three boot options, on my E7470, with its
FHD screen, in a very small font. Boot the topmost line. This starts the usual installer. After the keyboard option
chooser, log on as root. Partition the disk (see above) and run the setup program.
Select the software target partitions. Select the root partition '/' and format it (ext4). Do the same with the
'/home' partition. The installer recognizes the empty EFI partition and will format it and put its mountpoint into
the /etc/fstab file.
Select the install source (USB image) and let the software find it. Select ALL packages and do a FULL install. Sit
back and relax. It will take approximately 10 minutes to complete.
Just skip the rescue disk, You can always use a live usb image to do the same. Now you are reminded that your system is EFI based and that you must install ELILO. Obey. And finish the installation. Done.
Enter the OS in the EFI bootmanager
Start the computer. Enter the BIOS. Go to the BOOT SEQUENCE screen. In the 'boot list option' click 'add boot option'. Anew window opens. In the top line enter a descriptive name. Click the 'three dot icon' to the right of the bottom line. A third window opens and you can traverse the file system. Go to the EFI, Slackware, and select 'elilo.efi' and acknowledge. A new line appears in the boot sequence screen. Apply an exit the BIOS screens.
Done.
XFCE screensaver did not start
I selected the XFCE screensaver and chose 'Slide show'. In that case all pictures in your ~/Pictures directory are
displayed in random order. It is a very entertaining show, since my pictures date back to 1998. But all of a sudden
the Slideshow would refuse to start. I checked everything and couldn't find anything. If I logged on as another
user (please don't tell them!) the screensaver slide show worked as usual. But not for user 'jan'.
I had noticed that the screensaver did start when I manually locked the screen. Very strange. On 'LinuxQuestions' I
only found a guy that wanted to express his anger towards XFCE. That was not much of a help.
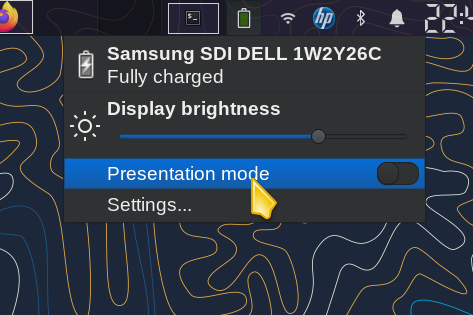
After 6 months I found the cause: I accidentally put the screen in 'Presentation mode' (click on the battery symbol in Panel 1). And in that mode the screen does not let go. Flipped the slider switch and the screen saver showed slide shows again.
Warning signs
Boot times
The new booting process is three times as fast as the non-UEFI booting. It's not easy to admit it... On the other hand, this machine is an EFI machine that can be extended to be a traditional DOS style MR booter. ?This overhead takes time. Simple as that. The new setup takes
Multilib timings
I created the mandelbrot picture below left with the command:
./mand05 -0.3705 -0.649 100000 200000 (on the left)Fluor (the Dell Latitude E5570 with Core i3 6100u processor) took 2:28 (148 seconds) to complete that task. Titaan did it in 1:58 (118 seconds). Time reduction: 4/5 = 20%, so speed increase 5/4 = 25% faster.
./mand05 -0.7 -0.27 100000 250000 (on the right)took 7 minutes on Fluor and 5:30 on Titaan. 14:11 ratio. 420 vs 330 seconds. 27% faster. Identical to the first mandelbrot. This is single thread software.
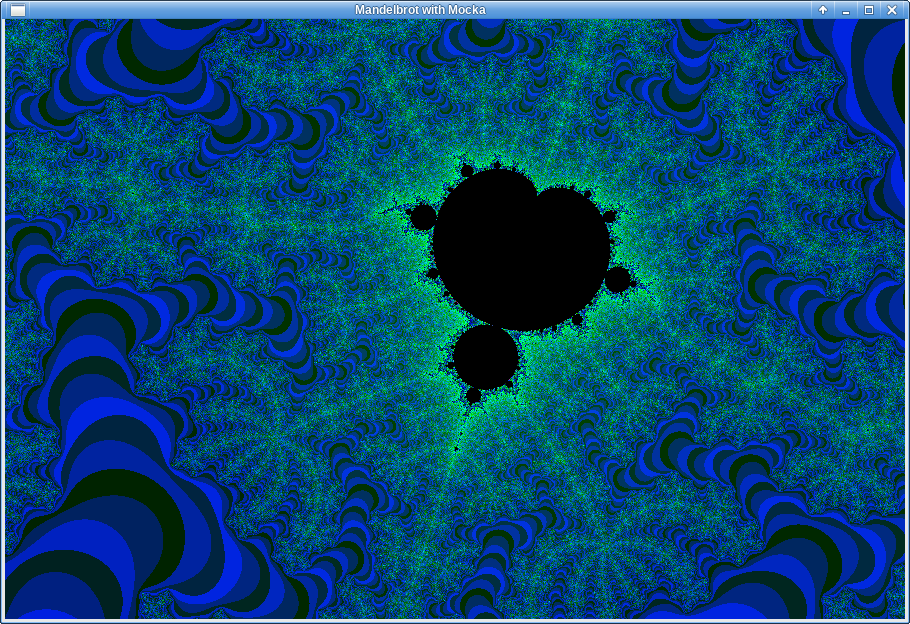
Load the images in separate tabs to view the full 600x900 resolution.
/etc hosts
This is my /etc/hosts file:
#
# hosts		This file describes a number of hostname-to-address
#		mappings for the TCP/IP subsystem. It is mostly
#		used at boot time, when no name servers are running.
#		On small systems, this file can be used instead of a
#		"named" name server.  Just add the names, addresses
#		and any aliases to this file...
#

# For loopbacking.
127.0.0.1		localhost
::1			localhost

192.168.56.2		helium.fruttenboel	helium

192.168.56.9		fluor.fruttenboel	fluor
192.168.56.11		natrium.fruttenboel	natrium
192.168.56.15		fosfor.fruttenboel	fosfor
192.168.56.16		zwavel.fruttenboel	zwavel
192.168.56.17		chloor.fruttenboel	chloor
192.168.56.21		scandium.fruttenboel	scandium
192.168.56.22		titaan.fruttenboel	titaan
192.168.56.23		vanadium.fruttenboel	vanadium
192.168.56.24		chroom.fruttenboel	chroom
192.168.56.25		mangaan.fruttenboel	mangaan
192.168.56.26		ijzer.fruttenboel	ijzer
192.168.56.27		nikkel.fruttenboel	nikkel
192.168.56.28		cobalt.fruttenboel	cobalt
192.168.56.29		koper.fruttenboel	koper
192.168.56.99		router.fruttenboel	router
192.168.56.156		hp559.fruttenboel	smartink
It enables me to access another machine with, for example,
ssh mangaanwithout having to remember that it's IP number is 192.168.56.25 (which would be a no-brainer for any chemical engineer). It also solves the startup warning about the unresolvable host.
Install a flexible kernel loader
After I learned how to use the elilo boot mamager for implementing on the Asus X415 it was time to install one on titaan as well.
Pre-history
Putting an OS on Titaan initially turned out to be a challenge. You cannot completely get rid of the UEFI/BIOS firmware. With the legacy BIOS rom's enabled and the boot sequence adjusted, you come quite a distance. This machine has no floppy or optical drives. They just would not fit this ultrabook casing. Still, when you only enable USB and NVME booting you won't be able to boot off USB. It needs three options (at least, for me) so I made the boot order
All of this changed when I remembered that I used to run the command
isohybrid slackware-current-30_May_2023-DVD.isoon all my DVD images, until a few months ago when some one told me that modern DVD images are directly USB bootable as-is. Well, that may be, but the UEFI-ish system on Titaan would not see the DVD-on-USB disk image at all, until I isohybrid-ed the exact same DVD image and burned it to a USB device. Start Titaan, press f12 and HOORAY the USB disk is recognized! And it boots from it immediately. Installing NOW.
After completing the install, reboot, to find out that the video mode is not supported and a kernel panic 20 seconds later. Something is really fishy.
So I consulted Alien Bob on his blog and he assured me that his 32 bit ISO image will also boot right away. So I downloaded the 32 bit mini install ISO (93 MB) off his webserver https://slackware.nl/slackware/slackware-current-iso/ and copied the image to a USB drive with
dd if=slackware-current-mini-install.iso of=/dev/sdb bs=2Mand tried to boot off of it. Great success. The Latitude's BIOS/UEFI immediately booted into the installer. The mini image works in the exact same way as a USB installer.
Take care! You need a WIRED connection to the net.
There is no option to choose a wifi network and log on. You need to supply the IP address of the new machine, the netmask and the gateway (router) address.
Installing from the Mini Install ISO
Pop in the USB stick and power up. It takes some time and then you get the familiar start screen for the installer. The default kernel will do. No need for a seperate keyboard layout. Log on as root, do the partitioning (see above), start the setup script. First choose the target partitions, then the source of the packages. Choose for an FTP/HTTP source. Choose 'http://slackware.nl' for the source server and '/slackware/slackware-current/slackware' for the source directory.
Spoiler alert: it failed, as if I was the first person to ever have tried this mini install method!
I went to my dungeon, connected the laptop to an RJ45 cable which was plugged into a switch, connected the charger and started the machine with the installer USB stick. It booted right into the installer program. Just hit 'enter' to choose the hugesmp kernel, ignore the keyboard alteration and log on as root. The disk was already partitioned so I started the setup script. Went to the Target Directory section formatted two partitions (one for '/' and one for '/home') and chose the FTP/HTTP installer method. The setup recognised the connected UTP cable and offered to perform a DHCP request to get an IP address. So far so good.
Then the troubles started. I followed Alien Bobs text but could not get the system to find the file 'PACKAGES.TXT' which it needs to determine which software is available. Only when I entered 'httpS://slackware.nl' I could get access to the HTTP server. I followed along and chose a full install of all packages. Then I ended up with a very persistent wget error message:
wget : note : TLS certificate validation not implementedEvery package triggered two of these messages, slowing down the file transfers considerably. Instead of two packages per second it slowed down to 10 seconds per package. So I Ctrl-C-ed out.
I tried the same with 'http://mirrors.slackware.com/slackware/slackware-current/slackware' and things got worse. Now the TLS warning already appeared when retrieving the packages file. And it commenced when downloading the packages. So I Ctrl-C-ed out as well.
Then I found a topic on Linux Questions with the solution: The server root 'URLrewrite' script that translates http requests to https requests gets in the way of wget and then the afore mentioned warning is issued. Only the UK mirror does not do this translation. I tried it and the UK mirror indeed worked flawlessly. An hour later I had the fresh files installed and the OS installed to the MBR of the NVME disk. Minutes later I was rebooting into my new Linux system.
Spoiler alert: big troubles ahead
Everything worked just fine, until I wanted to go graphical. Startx froze the system. The black screen of death. I could get out with Alt-Ctrl-PrtScr SUB. I repeated. Same result. I changed from XFCE to KDE: same freeze. I did run Slackware 15.0 LIVE edition and that worked perfectly. That's always the trouble with currents: some will work, some won't. And you have no freaking idea which version you tried and which one worked.
The next day
After a good night's rest I started the Ti machine. It refused to boot: kernel panic. Something is very wrong. I will just install Slackware 15.0 32 bit from my trusty old USB stick.
I just installed 15.0 on titaan. That went smooth... A lot faster than over a wobbly ethernet cable. Everything works. Even XFCE works as usual. Rebooting works. I have the impression that the net-installer skipped a few files or libraries. I did inform Alien Bob about my experiences but he was not amused. So I was even more determined to use a USB install again.
Useful links